المواد المطلوبة
اردوينو اونو
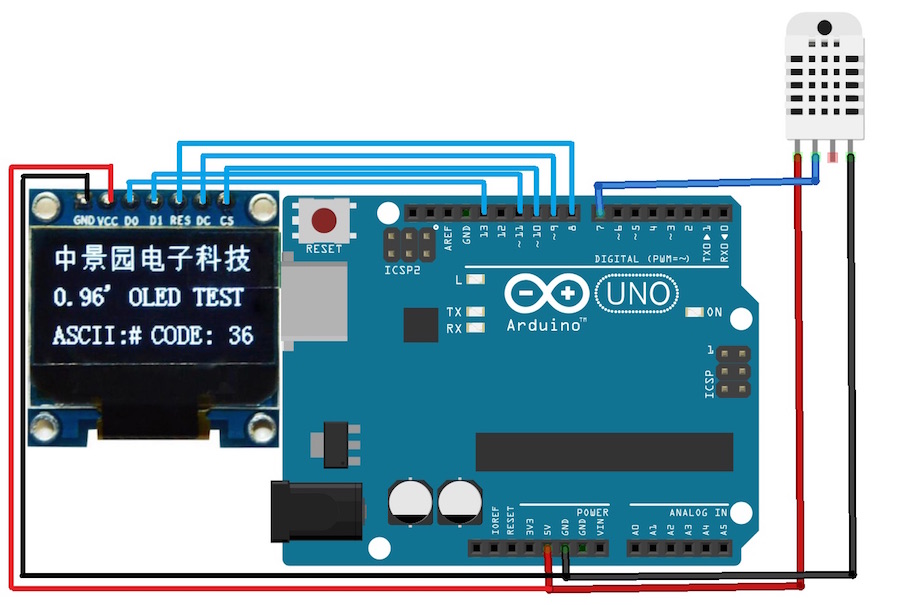
اردوينو اونو
شاشة 128X64 OLED
حساس DHT22 للحرارة والرطوبة
اسلاك التوصيل - لوحة الربط
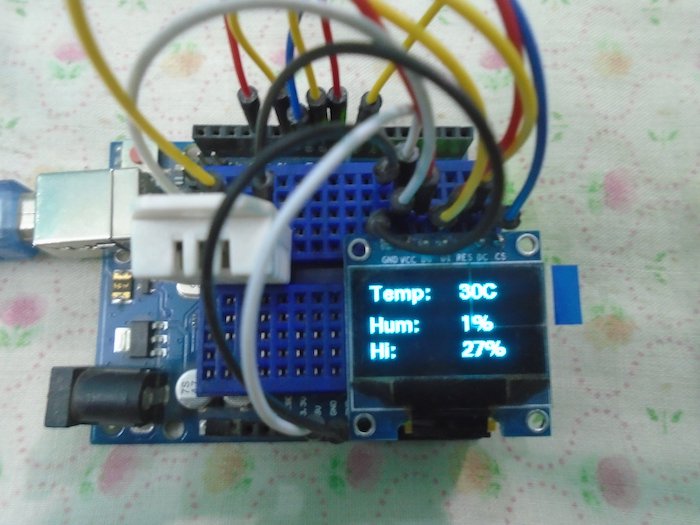
في هذا المشروع ، سنقوم بعمل ميزان حرارة و مقياس رطوبة OLED من اردوينو. سوف نقرأ درجة الحرارة والرطوبة من مستشعر DHT22 ثم نعرض البيانات على شاشة OLED.
كود اردوينو
#include
#include "DHT.h"
#define DHTPIN 7
#define DHTTYPE DHT22
DHT sensor(DHTPIN, DHTTYPE);

U8GLIB_SH1106_128X64 oled (13, 11, 10, 9, 8);

void setup()
{
sensor.begin();
oled.firstPage();
do
{
oled.setFont(u8g_font_fur14);    //setting the font size
//Printing the data on the OLED
oled.drawStr(20, 15, "Welcome");
oled.drawStr(40, 40, "To");
oled.drawStr(5, 60, "DIYHACKING");
}  while( oled.nextPage() );
delay(5000);
}

void loop()
{
float h = sensor.readHumidity();   //Reading the humidity value
float t = sensor.readTemperature();   //Reading the temperature value
float fah = sensor.readTemperature(true); //Reading the temperature in Fahrenheit
if (isnan(h) || isnan(t) || isnan(fah)) {  //Checking if we are receiving the values or not
Serial.println("Failed to read from DHT sensor!");
return;
}
float heat_index = sensor.computeHeatIndex(fah, h); //Calculating the heat index in Fahrenheit
float heat_indexC = sensor.convertFtoC(heat_index);    //Calculating the heat index in Celsius

oled.firstPage();
do
{
oled.setFont(u8g_font_fub11);    //setting the font size
//Printing the data on the OLED
oled.drawStr(0, 15, "Temp: ");
oled.drawStr(0, 40, "Hum: ");
oled.drawStr(0, 60, "Hi: ");
oled.setPrintPos(72, 15);       //setting the dimensions to print the temperature
oled.print(t, 0);
oled.println("C");
oled.setPrintPos(72, 40);  //setting the dimensions to print the humidity
oled.print(h, 0);
oled.println("%");
oled.setPrintPos(72, 60);  //setting the dimensions to print the heat index
oled.print(heat_indexC, 0);
oled.println("%");
}
while( oled.nextPage() );
delay(2000);
}